Posted on Leave a comment

Over the Garden Wall: The Best Wall Tiles for Outdoor Spaces


Over the Garden Wall: The Best Wall Tiles for Outdoor Spaces

What is it that makes the perfect outdoor space? For some, it is all about greenery and plant life, which add life and nature to the area. For others, it is about functionality; a well-designed yard with space for lots of people is great for folks who love to entertain. But for us, the perfect yard must have beautiful hardscaped elements – including any walled areas with veneer stones.

You have probably put a lot of work into your yard. You’ve carefully selected patio furniture, anguished over the perfect pavers, and carefully curated a beautiful garden. So, why should you settle for a boring concrete wall or wooden fence? Instead, dress up any walls in your outdoor space by using wall tiles.

Here are just a few options you can use to make your walls even more beautiful.

Veneer Stones

Lots of homeowners love the look of natural stone for their outdoor (and some indoor) spaces. Natural stone has a classic, almost rustic appeal, as if the stones were lifted from the earth and piled right around your yard. These days many hardscapers use veneer stone (a man-made tile comprised of cement, aggregates, and iron oxides) to recreate the look of natural stone, but the effect is still the same.

Pros

There are many benefits to using veneer stones in your yard. Firstly, these manufactured tiles are much easier to obtain than natural stone – though they look just the same. They are also light and easy to cut down to size, which makes installation a quick and painless process. You can achieve a classic, beautiful look without all the heavy lifting!

Cons

Because veneer stones are mostly made from concrete, they can become brittle and chip away over time. They are also subject to fading, which is particularly frustrating if you picked a tile for its unique color. Finally, because veneer stones are man-made, they may look a bit homogenous – and this can take away from the “natural” look you might be going for.

When to Use Them

Veneer stones are a great choice for any large, decorative outdoor area. You can use them to add color or texture to a wall or outdoor cooking area. These tiles will give your space a rustic appeal without forcing you to carry and lay tons of heavy stones.

Ledger Stones

Another option for outdoor walls is ledger stones. Like veneer stones, these tiles are made from concrete, and iron oxide – but ledger stone also adds natural stone to the mix. This mixture is then poured into molds designed to mimic the look of real stone, creating that same rustic aesthetic so many people love.

Pros

Just like veneer stones, ledger stones are exceptionally light, which can make installation a breeze. They are also durable (largely due to the presence of real stone in the mix). This makes them a great choice for outdoor spaces, as they will easily stand up to the elements and keeping looking great over time.

Cons

Ledger stones are not always easy to install. The installation process usually involves special materials and careful instructions, so it’s a process best left to the professionals. Additionally, can be hard to clean and maintain (especially if you install it near a pool or somewhere where it might get wet). It’s wise to have your ledger stone professionally sealed every year or so to maintain its color.

When to Use Them

Ledger stone tiles often come in long, thin strips, which makes them great for shorter, longer walls. If you want to add some decorative elements to a raised garden bed or firepit, this is an excellent option! Ledger stones also look great indoors as kitchen backsplashes or bathroom wall tiles.

Porcelain Tiles

Most people want their yards to look great for the long term. Even after years of family barbeques, rough weather, rambunctious kids and pets, and everything in between, your yard should still look incredibly beautiful – and it would be even better if it could stay that way with minimal maintenance. If that’s how you feel, then porcelain tiles are the ideal choice for your outdoor walls.

Pros

Porcelain tiles are the perfect blend of form and function. They are super easy to install (even weekend DIY-ers can tackle this project). They are highly durable, which makes them great for outdoor spaces and families with children. And best of all, they don’t require any maintenance to continue looking gorgeous.

Cons

There aren’t many downsides to using porcelain wall tiles. The biggest drawback might be in the way the finished product looks; porcelain tile doesn’t have the same “rustic” appearance as veneer or ledger stone, which might take away from the look you’re trying to achieve. Also, porcelain tiles can chip easily if you’re not careful during the installation process, which can tarnish the finished look of your wall.

When to Use Them

Here’s the great thing about porcelain tiles: you can use them anywhere you would have used other stones! There are a wide variety of porcelain options – including porcelain veneer stones and porcelain ledger stones. You can use porcelain veneer stones as a low-maintenance alternative on large walled areas or use porcelain ledger stones to add some extra flair to your low and long walls.

Upgrade Your Garden Walls

If you want your yard to look truly great, every aspect of the design needs to fit together. Wall tiles can help create a cohesive look throughout the yard – but the type of look you create is entirely up to you.

If you want a textured, rustic-inspired design, veneer stones might be your best bet. If you want something that looks great and stays that way without extra work, porcelain could be perfect. But however you choose to tile your walls, Elegance US will be here to help make the process as smooth as possible!

You can call today or send us an email with any questions about our outdoor wall tiles. We look forward to helping you beautify your outdoor space! 
Posted on Leave a comment

The Best Hardscape Ideas for a Low-Maintenance Yard

For too many families, the backyard is simply a lot of hard work. There’s always something that needs to be done: mowing the lawn, pulling the weeds, repairing the “toys” you bought for your weekend bashes (the pool, the grill, etc.). Too often, the yard becomes just another hassle that needs to be dealt with – but it doesn’t have to be that way. Here is the best hardscape ideas for a low-maintenance yard with porcelain pavers.

If you want to have a yard that looks great and requires little upkeep, hardscaping just might be the answer you’ve been looking for.

What Is Hardscaping?

Simply put, hardscaping is any kind of outdoor design that does NOT involve plant life. Your pavement, your patio, your manmade pond – it all falls under the hardscape umbrella. These elements are common in most people’s backyards, largely due to the many benefits they can offer the average homeowner.

Benefits of Hardscaping

Firstly, we wouldn’t be talking about hardscaping today if it was a low-maintenance design option. With hardscaping, keeping your yard in pristine condition is so much easier! There is no grass to cut. There are fewer weeds to pull (if any). In their place, you simply have beautiful paver tiles that are resilient, durable, and quick and easy to clean.

Additionally, hardscaping helps add functionality to your yard space. With a hardscaped yard, it is easy to divide your yard into a grilling area, outdoor seating space, or games area for any little ones in your home. By adding pavers or other manmade delineations to your yard, you’ve effectively made it a better space for all your family members and guests.

Finally, it’s worth mentioning that hardscaped yards are often more eco-friendly than traditional lawns – after all, less grass means less watering! If you’re looking for a way to do your part for Mother Nature, conserving water with a hardscaped yard is a great option. You’ll probably appreciate the savings on your water bill, too!

So, what kind of hardscaping is best for your low-maintenance yard? Here are a few of our favorite ideas:

Use Porcelain Pavers

[displayGallery id=109]

If you’re going to have a hardscaped yard, you need to make sure that you’re using the very best pavers possible. This is why we recommend Italian porcelain pavers. These tiles are exceptionally beautiful, and they always look great in an outdoor space.

In addition to their incredible beauty, porcelain pavers offer a wide range of benefits to the average homeowner. They’re skid resistant (which is great when you have kids or pets running around the yard), very easy to clean, and incredibly durable. With porcelain pavers in your yard, you can be sure that your space will keep looking beautiful long after you’ve finished installation.

Set Up Outdoor Seating

[displayGallery id=110]

As we mentioned earlier, hardscaped yards are great for families who want to get extra functionality out of their space. One way to do this is by creating designated areas in your yard for different activities. If your paved yard is separated visually into sections, it will appear larger and more functional – and the best way to section off your space is with outdoor seating.

You can find sets of patio furniture at just about any home improvement or home décor store. Arrange this furniture around a focal point (like a small table, pool/jacuzzi, or fire pit) and it will create a sort of “living space” where you and your guests can gather.

Landscape with Bark

Not everyone wants to have a completely paved-over yard. We get it; a huge part of being outside is enjoying nature, so it’s only natural to want some natural elements in your yard. However, if you want to incorporate plants AND keep your yard low maintenance, there is an option for you.

Bark mulch is a great option for many hardscaped or partially-hardscaped yards. The bark traps moisture in the garden soil, which means you don’t need to worry about watering quite as frequently. Additionally, bark provides weed protection, which means you don’t need to spend your afternoons pulling up garden intruders!

“Plant” a Rock Garden

Not into the bark look? Not to worry! Another great way to bring plants into your yard without too much work is by creating a rock garden. This hardscape design uses rocks and pebbles to cover the soil while a few plants (usually desert plants like cacti and succulents) add a delightful pop of color.

These gardens require only a few plants to look exceptional (which cuts down your watering time). Also, because they often feature hardy plants from harsh environments, they are especially durable and can look great all year round!

Add Artificial Grass

[displayGallery id=111]

Let’s say that you want to have SOME form of lawn in your yard – but you don’t want to spend your weekends weeding and mowing it. What do you do? One option is to install some artificial grass! Today, there are a wide variety of synthetic mulch options that both look and feel natural.

Artificial grass can give your kids a place to play sports, your pets a place to “do their business,” and a touch of greenery in your yard. But best of all, it ALSO provides you with a beautiful, grassy area that you don’t need to maintain. Everyone wins!

Give Your Yard the Elegance Touch

Hardscaping is a great way to make your yard more attractive – without adding to your already busy daily routine. Whether you want to prevent weeds with rocks or bark, replace your lawn with artificial grass, or beautify your space with porcelain pavers, there are many options available to turn your yard into the outdoor space of your dreams…

And best of all, you have the Elegance US team right here to help!


Posted on Leave a comment

How to Properly Pave Your Driveway

How to Properly Pave Your Driveway

Your driveway is an important part of your home’s general curb appeal. When a driveway is cracked or covered in oil and dirt, it can make your entire yard look less appealing! Likewise, a truly beautiful driveway can help elevate your yard, making everything around it look nicer and more sophisticated. Here is a complete guide about how to pave a driveway.

How can you turn your driveway into a piece of hardscaping art? It all comes down to two things: great tools and great technique. While you can hire professionals to tackle this job (and if you’re a landscaping novice, we recommend it), it is possible to pave a beautiful driveway all on your own. Here’s how!

Start with the Right Tools

Before you can begin any hardscaping project, you must make sure you have all the tools you’ll need for success. Obviously, your specific needs will depend on your specific circumstances (the finished look you’re going for, the current state of your driveway, etc.), but most paving projects will require the following:

·         Garden stakes

·         A screed board (or any large piece of lumber you can use to flatten your surfaces)

·         Cementitious adhesive

·         Joint filling material (any kind you prefer)

·         A broom

·         Gloves

Next, you’ll have to decide what kind of pavers you want to install. There are a wide variety of options out there – concrete, brick, flagstone, even marble – but if you ask us, the best material you can use is a set of Italian porcelain pavers.

Benefits of Porcelain Pavers

Porcelain pavers are durable, attractive pavers made from sand, quartz, feldspars, kaolin, clays, and other raw materials. These pieces are fired at very high temperatures (2,240 degrees Fahrenheit!), which make them incredibly strong; in fact, porcelain pavers can handle breakage loads up to 2,200 lbs.

Strength isn’t the only advantage porcelain pavers have. They are also skid-resistant (even when wet), easy to clean, and resilient against the elements. Even if your driveway endures years of rain, frost, and blistering sunlight, your pavers will maintain their original color! These features have made porcelain a popular choice among homeowners in recent years.

If you decide to use porcelain pavers on your driveway, you will need a few additional tools. Make sure you have the following:

·         A wet cut tile saw with a diamond blade

·         A paver clamp

·         A rubber mallet (for tamping down pavers)

Once you have everything, you’ll be ready to beautify your driveway!

Step One: Prepare the Existing Driveway

The first step of any home improvement project is taking stock of your existing space and decide about how to pave a driveway. Most driveways are already fully paved with a solid layer of concrete – but the condition of that concrete will vary from one yard to another.

If your current driveway is in poor shape – if it has lots of potholes, for example – you may have to remove the existing concrete (with the help of a professional). But if your current driveway is in fairly good shape, preparation is easy. Just make sure the pavement is clear of any debris (weeds sprouting from cracks, pebbles, etc.). Make sure you have a level, clear space on which to lay down your pavers!

Step Two: Lay Down Your Base Layer

Your porcelain pavers will need something to stick to (or else they may not stay in place on your driveway). Therefore, the next step is to lay down your cementitious adhesive. Make sure you use an adhesive that suits your specific pavers; you can find this information from your manufacturer’s instructions or by asking your seller.

Pour your adhesive over the concreted area and use a screed board (or other level board) to spread the adhesive and get a nice, flat layer. This will ensure that your pavers have a level surface on which to lay – which ultimately ensures your driveway is nice and level, too!

Step Three: Place Your Pavers

You’ve reached the most exciting step: placing your pavers on the driveway! This is the moment that your driveway shifts from bland or unappealing to absolutely beautiful. However, it is still important to make sure your placement is done properly.

Start at the lowest corner of your driveway and set your pavers onto the cementitious adhesive. Place them in your desired pattern, taking care to set each paver at least 4mm from the ones beside it (porcelain pavers can NEVER directly touch each other). If you need to cut down any pavers to fit your driveway, use the wet cut blade (other saws can damage the tiles).

Step Four: Fill the Joints

At this point, you should have a lovely-looking driveway filled with porcelain tiles – but you also have small gaps in between each one. Don’t worry, you’re not going to leave them this way! The next step is to use a joint filler to close these tiny gaps.

If you’re paving your driveway with porcelain, we recommend using some type of sand to fill your joints. You can choose from traditional sand, a sand/cement blend, or polymeric sand. Whatever you choose, make sure you follow the instructions that come with your specific type of joint filler, and ALWAYS make sure to clear away any residual sand when you’re done.

Step Five: Tamp Down Your Driveway

You’re almost done. The last step in paving your driveway is to make sure your pavers are fully secure. If you’re using concrete or stone, this would be the time to use a plate compactor, which uses vibration to help your pavers settle into the adhesive. However, this is NOT the method you should use with porcelain pavers; a plate compactor can damage the tiles and ruin all your beautiful work!  

Instead, use a rubber mallet to gently (yet securely) tamp down your porcelain pavers. This will ensure that your tiles settle deeply without causing any unnecessary force. Once you’re done, refill any joints that need a little extra sand and repeat the tamping process.

Just like that, your driveway will be ready for use – and it will look better than ever before!

Upgrade Your Hardscape with Elegance by NT Trading

Whether you’re looking to upgrade your driveway, renovate your kitchen, or hire a team to renovate your yard, the NT Trading team is here for all your hardscaping needs! Click here to contact us today. We can’t wait to help you with your next big project.

Posted on Leave a comment

Hardscaping Made Simple: How to Install Your Porcelain Pavers

DOWNLOAD PDF

Every hardscape contractor knows that a paving project requires two things: an excellent product and excellent technique. The most beautiful yards, driveways, and patios out there always use high-quality pavers – and they always have some top-notch contractors working on the installation. We provide details here for porcelain pavers installation.

At Elegance US, we strive to give our customers the best pavers possible (including our wide selection of Italian porcelain pavers). But once you’ve got your hands on these truly beautiful tools, will you know how to transform them into the perfect paved surface?

Don’t worry; we’re here to help. Here are a few tips to help you install porcelain pavers.

What Are Porcelain Pavers?

Firstly, let’s discuss what makes porcelain pavers so great for your customers’ yards. These rectangular pieces are made from natural raw materials like sand, quartz, feldspars, kaolin, clays and inorganic pigments. During production, these materials are fused together and fired at 2,240 degrees Fahrenheit, resulting in a hard, beautiful paver around 20mm thick.

Porcelain pavers have become especially popular in recent years. This is likely due to their many advantages: they are easy to clean, resistant to frost, maintain their color (even after years of rough treatment from the elements), skid-resistant, and they handle breakage loads up to 2,200 lbs!

With so many wonderful features, it’s no surprise that porcelain pavers are the go-to choice for most contractors and their clients.

Tools You’ll Need

If your client wants porcelain pavers in their yard, you’re in for a treat. The material is lightweight and easy to install, which makes your job quick and painless with incredible results. However, you will need a few specific tools before you can get started.

·         Make sure you have the following:

·         A wet cut tile saw with a diamond blade

·         A paver clamp (you’ll use this to both installs and remove pavers)

·         Notched trowels and grout float tools (note: select these tools based on the recommendations from your adhesive and grout manufacturer)

·         Gloves

Handle with Care

Porcelain pavers are incredibly durable once installed – but you still need to handle them with care. Most manufacturers ship their pavers with heavy-duty plastic pallet covers (or if you’re working with a smaller order, individually wrapped in protective cardboard). Once your pavers arrive, make sure you don’t remove the protective boxes until you’re ready for installation, as this will prevent accidental damage.

It’s also important to be careful as you install the porcelain pavers. Never use a plate compactor (this puts unnecessary pressure on the pavers), only cut them with a wet cut blade if necessary, and always make sure there is at least 4mm of space between your pavers.

If you follow these rules, you’ll be able to give your clients a paved space that’s as sturdy as it is stylish.

Joint Infilling

As we just mentioned, porcelain pavers should have at least 4mm of space between them for proper installation. So, how do you fill the space in-between? There are a few different joint filling options, but here are the ones we recommend:

Traditional Sand

This method uses traditional dry sand to fill the open joints. While dry sand is quick and easy to use, keep in mind that it can suffer erosion from the wind and rain over time. Therefore, it’s important to inform your clients that these joints may eventually need re-sanding.

Cement Blended Sand

For this method, combine three parts sand with one part cement to create a thicker, more durable paste. This cement blended sand can be swept into open joints and then misted with water to cure. However, make sure you remove any residual from the pavers themselves, as they can stain if left unattended.

Polymeric Sand

This method uses polymeric sand (sand blended with polymers that harden with moisture). You can use this filler in the same way you would use cement blended sand: sweep it into the joints and mist it to cure. However, please make sure that the polymeric sand you use is suitable with porcelain pavers. Some varieties require porous pavers, and porcelain pavers are non-porous.

Installing Your Pavers

You have all the tools you need – your pavers, your saw, the joint filler of your choice. It’s finally time to start installing this porcelain! But what method should you use? The answer depends on the space you’re paving and the road base.

Here are a few different ways to install your porcelain pavers:

Sand Set over Compacted Road Base

This option is ideal for areas that see a lot of pedestrians foot traffic.

·         Pour your base material 6-8 inches beyond the edge of the pavement

·         Secure a peripheral restraint system spike over the base area

·         Lay your pavers over the base material at a 1.5-2 degree slope pitched away from any buildings

·         Make sure all pavers are 4mm apart and use your joint fillers to close any gaps

Sand Set over Concrete Overlay

If you’re working with an area that already has concrete, spray a thin layer of sand over it and use this method.

·         Secure a peripheral restrain system into the concrete base

·         Drill ½-inch drainage holes in the concrete

·         Lay a layer of geotextile over the concrete

·         Make sure the concrete is covered by a 1-inch thick (pre-compacted) layer of sand, then compact it

·         Lay down pavers (4mm apart) and fill in joints with the material of your choice

Cementitious Adhesive Overlay with Concrete Base

If the area you’re paving expects light vehicle traffic (such as a driveway), consider the following method:

·         Use an approved cementitious adhesive to cover your concrete base

·         Lay down your pavers with the approved spacing and fill the joints with the appropriate grout

Permeable Over Open Graded Aggregate

For spaces that use a permeable subgrade, use this method:

·         Extend base area 6-8 inches beyond the paved area

·         Place a peripheral restraint system over base area

·         Make sure there is a base of ¾-inch open-graded aggregate, as well as a 2-inch bedding course of 3/8-inch open-graded aggregate

·         Lay down your pavers and fill the joints

Steppingstone Sand Set on Compacted Road Base

If you plan to install porcelain paver stepping stones, use this method:

·         Dig out space for each stepping stone and fill it with a compacted road base

·         Add a 1-inch thing layer (pre-compacted) of sand bedding

·         Lay down your porcelain paver

Fixed Pedestal on Concrete Floor

Finally, if you are installing your pavers over a concrete floor or slab, use this method:

·         Level out your concrete and ensure it is smooth with a 2-degree pitch angled away from any building

·         Install 1/8-inch or ½-inch pedestal supported at the corners of each paver

·         Lay down the pavers and fill in the joints with the appropriate filler

Make Your Yard More Elegant

Whatever project you’re working on, you can trust that Elegance US will give you the best product in the hardscaping business. Take a look at our selection of porcelain pavers, natural stone, wall tiles, and much more today.

Posted on Leave a comment

Make Your Yard More “Elegant”: Pattern Ideas for Italian Porcelain Pavers

Choosing the right paver for your yard is not an easy decision.

You have to think of materials: what will be durable enough to stand up to rough weather and regular use, yet still look beautiful over time?

You have to think of color: what will best suit the other landscaping elements (plants, the size of your yard, etc.)?

You have to think of comfort: which textures will be best for your family, neighbors, and pets to walk on each day?

And finally, you have to think of patterns: what’s going to be the best-looking layout?

At Elegance US, we want your yard to be your own personal oasis, and we know that the right paver can make all the difference. That’s why we’re proud to offer you the very best exterior pavers you’ll find anywhere – including a great selection of Italian porcelain. Special thanks to https://construction2style.com/ for inspiration! 

About Italian Porcelain Pavers

As the name suggests, Italian porcelain pavers originated in Italy. Outdoor porcelain pavers are quickly becoming the hottest trend in landscape design, thanks to their beautiful look and incredible durability.

Porcelain pavers are stain-resistant, durable enough to withstand heavy use, and less likely to develop rot or mold than stone or wood options. Best of all, the high-end glazing techniques used to create these pavers make them exceptionally beautiful – even years after installation!

Our Favorite Pattern Ideas

If you’re considering adding Italian porcelain pavers to your yard, we commend you – you clearly have excellent tastes! But how should you arrange these pavers in your yard? The answer depends on the look you want to achieve.

Here are a few of our favorite paver patterns. They just might inspire you!

Elegance Herringbone at 90 Degrees

If you’re planning to use your outdoor porcelain pavers on a tall space (like the walls of a pool or a garden wall), take a classic herringbone pattern and tilt it upwards 90 degrees. This subtle shift will draw the eye upward, making your space feel larger overall. This pattern is also incredibly strong, which makes it a great choice if you plan to have heavy furniture in your yard or use the space every day.

porcelain pavers

Elegance Step Ladder

Do you want to make a small part of your yard (like a narrow walkway or small, covered patio) feel larger and more open? One of the best ways to do this is to arrange your rectangular pavers in a step ladder pattern. This pattern is like the herringbone, but instead of drawing the eye up, the diagonal point of the pattern draws the eye outward.

outdoor porcelain pavers

Elegance Classic Subway

If you’ve ever visited the New York City subways, you’re likely familiar with this classic tile pattern. The subway pattern is rather simple. It’s just rows of pavers in straight, clean lines, slightly offset from one another. However, the simplicity of this design gives it a cool, minimalist look – and if you use Italian porcelain to achieve this look, the finished product is even chicer.

laying porcelain paving

Elegance Geometric Look

This pattern features two horizontal pavers placed alongside two vertical ones. It’s simple, yet unexpected, and the finished product is really fun! This is a great pattern for large paved areas like pool decks or fully paved yards, as it adds a unique design touch to the overall look of your landscape.

belgard porcelain pavers

Elegance Classic at a Diagonal

Let’s say that you want to give the classic subway look a modern upgrade. How would you do it? The answer is easy: rotate the pattern 45 degrees! This slight change can make a big difference in the overall look of your pavement. It’s also a great choice if you have an irregular-shaped yard, as the diagonal direction of the pavers can help draw the eye to a focal point like your pool or seating area.

arterra pavers

Elegance Stacked Vertical

This pattern is as simple as they come – your pavers are placed vertically in a few straight lines. This is ideal for folks who want to pave long, thin areas like a small walkway or a series of steps. The pattern’s simplicity won’t distract from the other elements in your yard, while the pavers will still look exceptional.

msi pavers

Elegance 90 Degree Classic

This time, we’ve taken the classic subway pattern and flipped it 90 degrees, so it stands completely vertical. Again, this is a great choice for a narrow backyard area, as it helps make space appear larger overall. It’s also a unique and unexpected option!

24x24 porcelain pavers

Elegance Stacked Tile

Do you like the lines of the subway pattern, but wish they were a little… cleaner? This stacked paver pattern is ideal for you. Instead of offsetting each row, the pavers are lined up perfectly, creating a sleek grid pattern that’s very modern. This is a great layout for people who want a simple, clean look for their outdoor pavers.

arterra porcelain pavers

Elegance Stacked Vertical – Alternating

This pattern starts with a stacked vertical layout but then offsets the rows just slightly. This adds a little drama to the overall pattern and makes for a fun look in your yard! Use this pattern on pool decks or seating areas for a clean design with a little more visual flair.

porcelain pavers cost

Elegance Classic Herringbone

The herringbone paver pattern is one of the most popular landscaping options around. You’ve probably seen this look in your neighbors’ yards, your family member’s yards, and maybe even your own! But there’s a reason that the herringbone is just a fixture in the landscaping industry – this pattern looks great in yards of any size! If you’re looking for a tried and true paving pattern, you can’t go wrong with this one.

grey porcelain paving

Elegance Stacked Horizontal – Alternating

Like the vertical alternating, this pattern takes the horizontal “stacked tile” look and offsets the pavers. The finished look is unique and fun but still looks clean enough for any minimalist to fall in love with it. This pattern is great for square or rectangular paved areas like seating areas or outdoor grilling stations.

porcelain pool coping

Elegance Herringbone at 45 degrees

Finally, let’s take a look at the last herringbone variation layout pattern. This option rotates the classic herringbone pattern 45 degrees so that the pavers point off to either side of the space. This keeps the viewer’s eyes traveling around the yard and creates an overall feeling of vastness – which makes it perfect for smaller yards!

porcelain paving near me

Give Your Yard a Little Extra “Elegance”

Whether you want a clean, minimalist pattern or a unique and artistic look in your yard, there’s no better option than beautiful Italian porcelain pavers. And if you want your pavers to look their very best, there’s no better supplier than eleganceus.com !

Contact us today to learn how we can transform your yard into the paradise you deserve.

Posted on Leave a comment

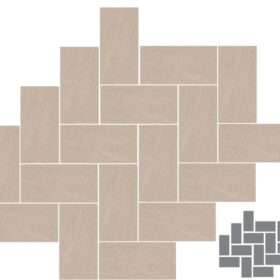
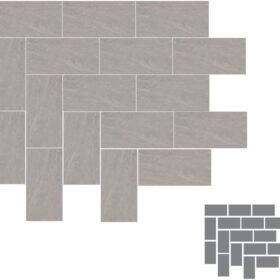
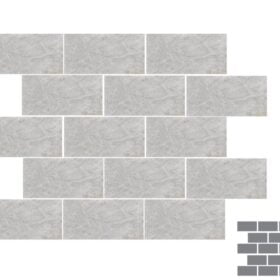
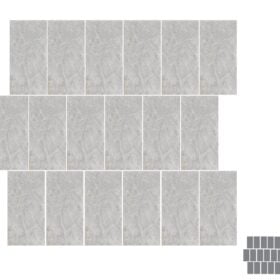
Natural Stone Veneer Patterns

A wide variety of wall tiles and products created in various colors, shapes, sizes, and styles suitable for a wall that is easy to clean and maintain. Natural Stone Veneer Patterns are the best for your walls.

Wall tiles are used in many homes, commercial properties, etc.

Elegance by NT Trading presents Natural Stone Veneer Pattern. A very bold, stylish, and modern way to decorate your house, fireplace, fire pit, etc.

While providing top quality Natural Stone Wall Tile, Elegance by NT Trading offers a suggested pattern for our customers that has been generated by our team to keep the beauty and elegance of the veneer. Follow the link below for more info:

https://eleganceus.com/veneer-stone/500-afyon-ice-marble-veneer-stone-pattern.html

Available in different colors, our veneer stone patterns dominate the market in the East Coast making it one of the best solutions when it comes to covering your walls.

Posted on Leave a comment

Recycled Glass Pool Tiles Mosaics


Glass pool tiles have been decorating many swimming pools thanks to their flexibility in design and their performance in the reflection of light.  They are used to create wonderful glass mosaic designs, which turn the swimming pools into a work of art.

As Elegance by NT Trading we promote Recycled Glass Mosaics to contribute to environmental management and take one step forward in the reduction of waste. Elegance Recycled Glass Pool Mosaics come in a wide variety of colors and surfaces. They can be sandblasted, shiny, pearlescent, or matte. The smaller sizes are used primarily for mosaics but there are likewise bigger sizes and pebble-shaped tiles for use in different applications for the home. Prices depend on the finish, color of the tile and the way it was handcrafted.

Come visit us to see what we have to offer to enhance your pool or spa area.

Posted on Leave a comment

CHOOSING THE SHAPE OF YOUR POOL AND MATERIAL OPTIONS


It’s important to remember when contemplating a design that you should not be limited to a standard rectangle pool. Maybe a Lap Pool is what you want but customizing and personalizing the entire living space should be considered first. The layout of the pool shapes the entire area. Patio, entertainment center, maybe a kitchen or firepit. Consider the shape of your backyard and layout of the living space. Maybe a Free Form design, Kidney or L shape. If you are thinking of adding a spa this should be thought out in advance.

Our elegance product line consists of natural stone and exterior porcelain materials to complete any dreamscape. Stone veneers for garden walls, firepits, fireplaces or kitchens centers.

We offer a large selection of in marble, travertine and quartz slabs for outdoor countertops and our French pattern pavers in travertine and marble for patio areas. The collection includes modular patterned porcelain and a variety of other sizes and shades. Our natural stone pool copings are also available in many lengths with a bullnose or eased edge finish.

NT Trading can customize any project and we offer full fabrication and templating services. @www.eleganceus.com

Posted on Leave a comment

HARDSCAPE MATERIALS AND PREPARING FOR COOLER TEMPERATURES

FREEZE-THAW damage occurs when porous materials absorb water and temperatures then drop below freezing and water turns to ice and expands. Travertine is known to resist the freeze-thaw cycle but clearly, there are many factors involved. Installation methods play a part as well as the density or quality of the travertine. For absolute protection of your investment, we recommend sealing every 2 to 3 years to observe your hardscape materials and prepare for cooler temperatures.

Here at NT Trading Inc., we pride ourselves on a higher grade of Elegance travertine that is less porous of stronger density and more resistant than others on the market. In a second- grade travertine that may be more porous it may be more susceptible to damage in a freeze-thaw cycle. The travertine of less density is more suitable for warmer climates where cooler temperatures are not a concern. @eleganceus.local

Posted on Leave a comment

Split Faces For Outdoor Spaces


The quality of the natural stone for Outdoor Living Spaces is something that can’t be replicated. It is extremely durable and lasts a long time, unlike cultured or faux veneer that can fade over time.

Stone veneer is a popular complementary material for outdoor living spaces. At NT Trading, we offer the best selections of natural thin stone veneer from our quarries in Turkey. Elegance Stone Veneers add beauty and value to your home whether they are used to compliment the facing of your house your outdoor grill, fireplace or island. It’s an easy install and will transform any gathering place.


We stock our Ledger Panel (6”x24”) and Split face (4”x8”,4”x12”, and 4”x16”) in all of Elegance Travertine and Marbles. Stone veneer will create an elegant and unique finish to your outdoor living spaces and now is the time to think about fall entertaining around the fireplaces and pits. www.eleganceus.com