Outdoor tiles are gaining popularity among homeowners more than ever these days. Those who want to have a luxurious yet durable outdoor space for their home are now considering getting outdoor tiles for their outdoor space. Outdoor space has become one of the most crucial yet practical trends that should have been a thing for many years prior.
The use of outdoor tiles for renovating the outdoor space has become increasingly popular thanks to tile’s unique visual aesthetic and unwavering versatility. A wide range of outdoor surfaces can be tiled, including floors, backsplashes, countertops, pools, and patios. Understanding the steps is the key to successfully installing tile outdoors.
Before Starting the Project, Consider This
Installing outdoor tiles is also almost the same as laying indoor tiles, but outdoor tiles are usually prone to certain elements and other risks than the interior of the home is not. On the other hand, the indoor tiles compared to the outdoor tiles have to be very resilient to sustain different intensities of weather, water, and light. For instance, an outdoor tile must handle freeze and weather cycles if a homeowner lives in an area prone to such weather patterns.
Since porcelain pavers, tiles, and stone are thicker, denser, and can withstand foot traffic, they can also prevent water absorption. These are most commonly used in outdoor installations. Nevertheless, to ensure the installation of tile on a home’s exterior is properly and effectively performed, a complete evaluation of the entire installation assembly should be considered to ensure that all of the installation components, including the finishes, are correct for these demanding circumstances.
All of these must be taken into consideration before a successful outdoor installation process. Before you start the work, consult on the most suitable underlayment products, membranes, tile and stone mortar, grout, and other installation products with us.
Is DIY Outdoor Tile Installation Possible?
If you know the basics, you can install yourself with the right tools. NT Pavers recommends calling a pro for the perfect installation. If you can’t hire a pro, you can install outdoor tiles yourself but keep in mind that they’re more expensive than travertine pavers. When you lay porcelain tiles, natural stone, and marble outside, sand is an essential part of the process. This material is great for patios and other outdoor areas because of its rigidity and firmness.
You can’t go wrong with porcelain tiles for a natural-looking flooring material that’s both durable and cost-effective. A lot of natural products come in a variety of colors, too, like stone, wood, and bamboo. As well as providing a great foundation for tiles, sand can also help prevent slips and falls, especially during wet weather. You can also sand the tiles to make sure they’re smooth and even to improve their appearance. As a bonus, sand is perfect for patios because it reduces footsteps and other noise.
Where can outdoor tiles be installed?
Because outdoor tiles are heavy-duty, you can install them on any surface. If you’re moving home or just want to update your space, you can lift the tiles quickly and install them another way. So for these advantages, these tiles are preferred by numerous homeowners. For a better idea, we will guide you about where and how to install the outdoor tiles.
Hardcore Base
From our practical perspective, this is the most usual way of laying outdoor tiles, especially in the suburbs of the US. It entails digging out the section of your patio, putting in the crushed hardcore, and setting your tiles on a bed of mortar composed of cement and sand.
Advantages: Since the tiles are stuck to the ground, you have an assurance of a nice and long-lasting finish for your garden.
Concrete Base
If you are extending your home or are in a new-build property, then quite likely you will have a solid concrete base for your terrace. Porcelain tile adhesives can also be used during the installation of outdoor tiles on cured concrete the same as indoor floor tiles.
Advantages: Tiles are fixed for good and it’s probably easier to tile with adhesives than mortars.
Grass or Gravel
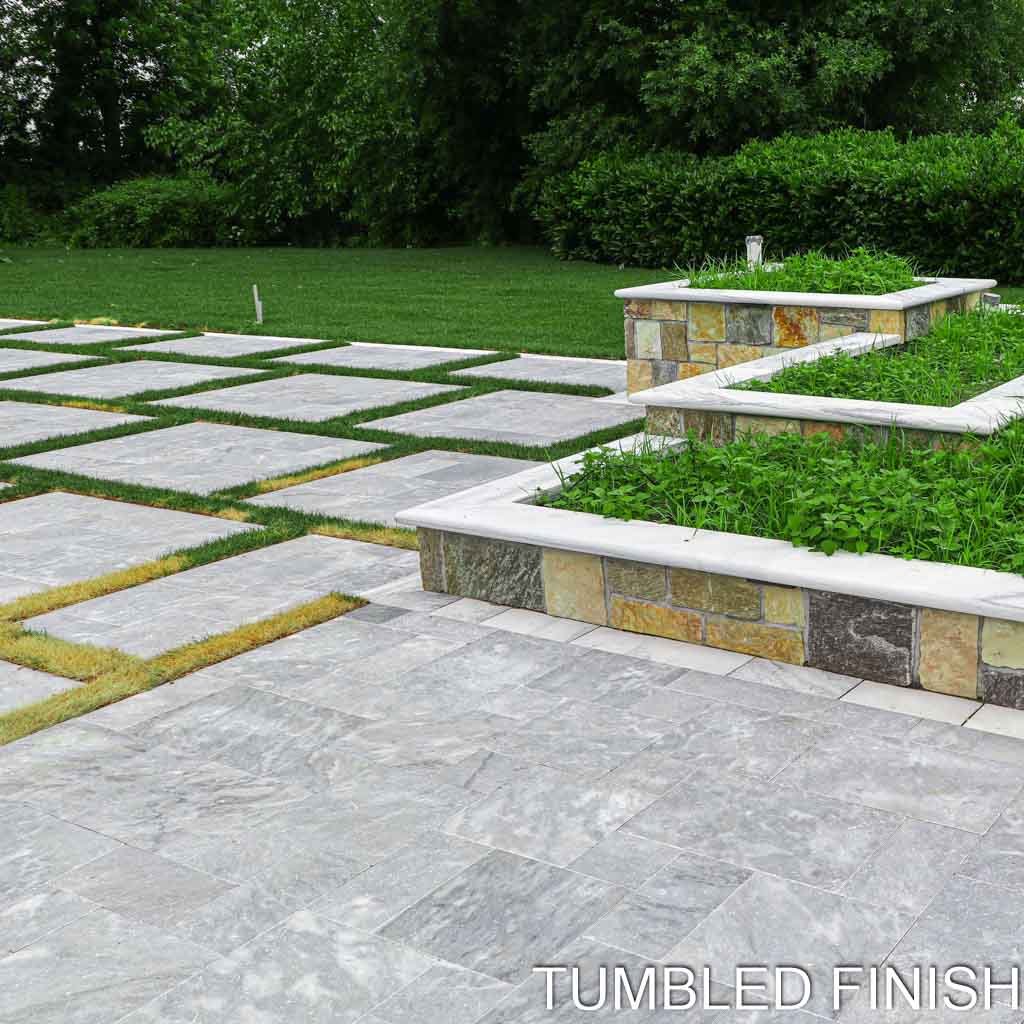
Different from conventional tiles, which will flake if not adequately supported underneath, porcelain pavers can be installed dry onto grassland, gravel, or even soil without the fear of them cracking. This approach doesn’t need any ‘wet’ installation materials and is commonly used for placing stepping stones across lawns and backyards.
Advantages: When you have done that, the tiles will be dropped in place. It is a simple Do-It-Yourself solution.
Raised Pedestals
A relatively recent alternative is laying your outdoor tiles onto plastic pedestals which simply sit on any surface without grout or adhesive. It is a widely used system in commercial terraces, balconies, and rooftops since all wires-up pipes can be concealed within the cavity underneath the tiles.
Advantages: After setting the pedestals, tiles can easily be laid into position and later taken out if need be.
Installing Outdoor Tiles On Hardcore Base
-
Excavation and Base Preparation:
Mark and excavate the patio area at least 150mm below the finished floor level.
Fill with a minimum 100mm layer of MOT1 hardcore, compacting it using a whacker plate in layers.
Ensure a 25mm fall every 1.5 meters away from buildings, using a string line.
-
Mortar Bed Preparation:
- Mix six parts of sand with one part of ProPave Mortar using a cement mixer.
- Achieve a firm consistency, ensuring the mortar is not too runny.
- Apply a minimum 30mm layer of mortar over the compacted MOT1, roughening the surface with a spade.
-
Tile Installation
- Mix ProPave Slurry Primer with water and apply a thin layer to the reverse of each tile.
- Lower primed tiles onto the mortar bed, starting usually in a corner.
- Tap down with a rubber mallet to the desired height, using a spirit level for fall adjustment.
- Use spacers for even gaps between tiles, and clean up mortar with a damp sponge as you go.
-
Final Steps
- Allow at least 48 hours before grouting.
- Grout or use jointing compound between tiles.
- Ensure all steps are followed precisely to achieve a lasting and visually appealing patio installation.
Installing Outdoor Tiles On Concrete Base
-
Concrete Slab Preparation:
- Ensure the concrete slab is perfectly flat and free of dirt or debris.
- Seal the surface with tile primer if necessary.
- Allow fresh concrete slabs to fully cure before tile application.
-
Materials Needed
- High-quality porcelain tile adhesive.
- Notched trowel, spacers, and grout or jointing compound.
-
Tile Adhesive Application
Mix the tile adhesive with water following the manufacturer’s instructions.
Apply the adhesive to the concrete slab using a notched trowel.
‘Back-butter’ each tile by spreading a thin layer of adhesive on its reverse.
-
Tile Installation
- Gently lower the first tile into place, starting in a corner.
- Tap with a rubber mallet to achieve the desired height and use a spirit level to check the fall.
- Work your way out, placing one tile at a time, using spacers for consistent joints.
-
Finishing Touches
Wipe away excess adhesive with a damp sponge during the installation process.
Allow the adhesive to set before proceeding to grouting.
Installing tiles on a concrete slab provides a stable substrate, reducing the risk of tile shifting over time. Attention to detail during the adhesive application and tile placement ensures a durable and visually appealing outcome.
Installing Outdoor Tiles On Grass or Gravel
Ideal for DIY outdoor tile projects or adding style with stepping stones.
No special tools or materials are needed for a quick and stylish finish.
-
Surface Recommendation:
- While outdoor tiles can be laid directly on grass or gravel, a flush finish with the surroundings is recommended for a better aesthetic.
- Ensures mower blades won’t catch tiles during lawn maintenance.
-
Installation Steps:
- Place tiles in final positions, allowing a minimum 50mm space between them.
- Use a spade to mark around the tiles.
- Dig out grass and soil to an 80mm depth, being mindful not to damage the surrounding lawn.
- Fill the hole with fine gravel, compacting it down to a maximum depth of 60mm.
- Carefully lay the tile onto the gravel and tap gently with a mallet until it’s flat and stable.
-
Jointing and Grouting:
- No need for grout or jointing compound.
- Grass or gravel forms an attractive and functional joint, allowing easy drainage of rainwater due to their porous nature.
This method offers a stylish and practical solution for laying outdoor tiles or creating decorative stepping stones. The absence of grout or jointing compound simplifies the process, and the porous nature of grass or gravel ensures efficient rainwater drainage
Installing outdoor tiles on Raised Pedestals
An increasingly popular method for installing outdoor tiles, offering DIY convenience, cable hiding, and easy removal for relocation.
-
Installation Advantages:
- DIY-friendly: Pedestals and tiles can be fitted without creating a mess.
- Concealed Utility: Hide cables and pipes underneath the tiles.
- Easy Removal: Facilitates relocation plans without difficulty.
Installation Steps
- Ensure a stable subfloor with a gradient for proper water drainage.
- Typically, use a pedestal in each corner of a tile, with an additional one in the middle for weight distribution.
- Start laying pedestals and tiles in a corner, with tiles remaining flat without the need for a slope.
- Pedestal design ensures a small, consistent joint between tiles, connecting to spacer lugs on each pedestal.
- Adjust pedestal height as needed using a spanner or provided tool.
Completion and Usage
- Once all pedestals and tiles are laid, the job is complete.
- No mess and no immediate use of the new space as the outdoor tiles are not grouted.
Note: Ensure the substrate beneath the tiles is waterproof, with proper drainage for rainwater falling through tile gaps.
Let’s Install The Outdoor Tiles Like They Should
Now you have the right idea about outdoor installation so let’s put the tiles in a way that can enhance your landscape’s appeal. We can be of great help in that regard at NT Pavers. Whether you’re a DIYer or an expert tile installer, we love working with you. Make sure you get the tools you need for your home improvements from a reputable company. Make sure you have exactly what you need by downloading our tool catalog.


